
berikut adalah salah satu contoh tutorial corel draw yang saya posting yang berjudul cara membuat efek foto yang menarik berbentuk susunan dalam corel draw 11, 12, x3, x4, x5 .
semoga dengan tutorial hasil kopi paste saya ini bisa bermanfaat bagi temen temen desain di seluruh jaringan internet sedunia

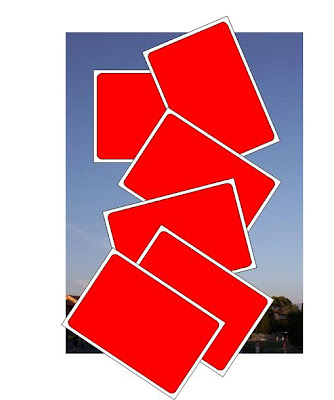
Step-2 Draw a rectangle with 0 in angles + in the keyboard and resize now change the angle to 10
now Duplicate
Step-3
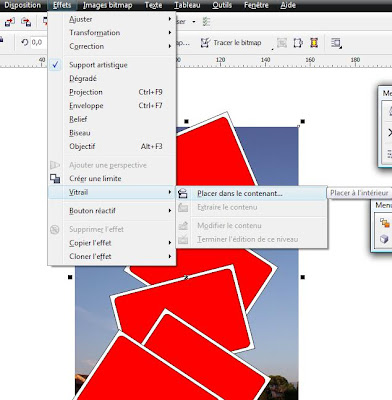
Select one image and menu effect > add to miror
Result
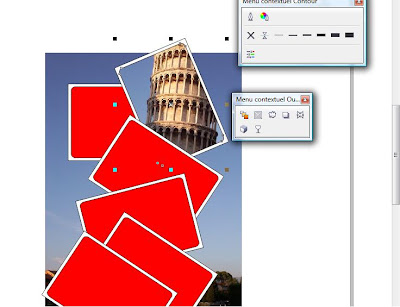
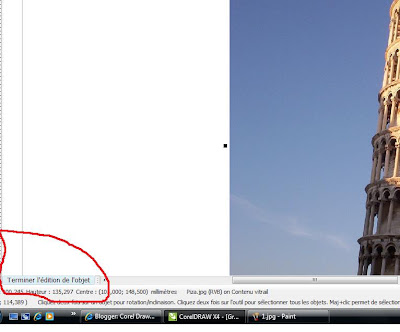
as you see the pic is not in the right place don't worry just click right botton on the pic and chose edit contenent

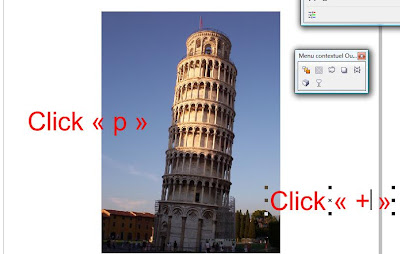
now select the pic click "p" tp put it in the center and click end edition
Now repeat the same thing with the other rectangles and images when you finish select all the shapes and remove the outlines and i hope you got something like this

enjoye it..
semoga dengan tutorial hasil kopi paste saya ini bisa bermanfaat bagi temen temen desain di seluruh jaringan internet sedunia

Hi
.. in this tutorial we're going to make a beutifull photo effect with
corel Draw x4 .. us you now most of people use Photoshop for this kind
of works but i tried with coreldraw x4 and i did it faster and easyer
so. lest start.
Step-1 open and image in coreldraw x4 click P to put it in the midle of page after click + to duplicate it 6 times ok
Step-2 Draw a rectangle with 0 in angles + in the keyboard and resize now change the angle to 10
now Duplicate
Step-3
Select one image and menu effect > add to miror
Result
as you see the pic is not in the right place don't worry just click right botton on the pic and chose edit contenent
now select the pic click "p" tp put it in the center and click end edition
Now repeat the same thing with the other rectangles and images when you finish select all the shapes and remove the outlines and i hope you got something like this
enjoye it..


kalau pakai corel 11 bagaimana cara step terakhir
BalasHapuslewa efek trimt
BalasHapusatau juga bisa lewat pen tool
BalasHapus